
A dream catcher is an object that is usually demanded by many people. It usually serves as decoration and gives a special touch to your room. However, it is not necessary to spend money to have one. You can learn to make a homemade dream catcher.
In this article we are going to tell you how to make a homemade dream catcher, what are its characteristics and different ways to do it.
How to make a homemade dream catcher with a plate

Surely at home you have plates, strings or even disposable beads that you have used in other crafts. Wire, feathers, wool… there are many recycled materials that you can use for this craft. Take a look at what is in your home and start inventing your unique dream catcher.
The first idea we have has to do with making a dream catcher by recycling disposable plates. It can be made of cardboard or plastic, although cardboard is definitely more comfortable. But any of them can work perfectly.
The first thing you should do is discard the plate. It will be the circle that forms the main part of any dream catcher. This is where the rest of the elements come from. To do this, you must cut the middle section. Keep only the outer edges. If it's cardboard, just cut out the middle circle and lightly sand the entire cut to remove any burrs. If it's made of plastic, you can heat it up a bit to soften it so it softens up so you can handle it well.
Paint or decorate it however you like. You can use watercolors, sprays, stickers, stickers, and more. Everything you have at home can be used to decorate the plate. Then you will have to make 8 holes, symmetrical with punches if possible. Through these holes you will pass the wool that will form part of the central frame of the dream catcher. It is the "spider web" that captures dreams.
The other three holes at the bottom will help you make the hanging part of your dream catcher. Again, you can use wool, string, thread, or any other material you have. Decorate the piece with beads, hema beads, or anything else you can think of. If you are going to opt for a traditional dream catcher, Ideally, the decorations end in feathers, but if you don't have any, you can use ribbons, fabric scraps or anything else.
How to make a homemade dream catcher using a pressure cooker rubber
If your old pot is about to be thrown away, save the gum because you can make a perfect homemade dream catcher for yourself. The type of rubber that belongs to another appliance can also be used. Depending on its size, this will be the size of your dream catcher.
In this case, the rubber is ready to do its work on the dream catcher, so you have to go directly to the decorating step. You can use the same technique that we told you about for disposable plates. After that, the rest of the steps will be exactly the same.
How to make your own dream catcher with wool and wire

This option is one of the most beautiful. If you have electrical wiring in your home, you may find it helpful. It can be from the spiral of a notebook that you are throwing away, or from any other product. Make sure it is a flexible and manageable cable. You have to use this to make the circle in the center part of the dream catcher. If you have enough wire, it's a good idea to wrap it several times to make it tight.
The circle does not need to fit you perfectly. That wire will be hidden from view. You will cover it with wool, thread, string or a bow. Anything around the house that can wrap it around a wire will do. We recommend using wool to make it, although the whole cover piece is time consuming, the final effect is worth it.
You need to cover the entire circle with loops of yarn. Try to screw all the turns so that the wires are no longer visible. Besides, it will be prettier this way. When you're done, tie a small knot in the fleece and try to hide it between the turns. In any case, it is best to use it as a reference for some decorative elements through which the cobwebs will be threaded and hung. This will make the knot dirty.
You can use more wool to make webs and decorations. You can decorate everything with beads, hema beads or whatever. You can even use different threads if the colors match. There are many possibilities and they will all be great.
How to involve children
We have seen how to make a dream catcher with recycled materials in several designs, and although any of these can be done with children, we also wanted to explain how to do it in an easy way using materials that we can also recycle from the articles.
First we need these materials:
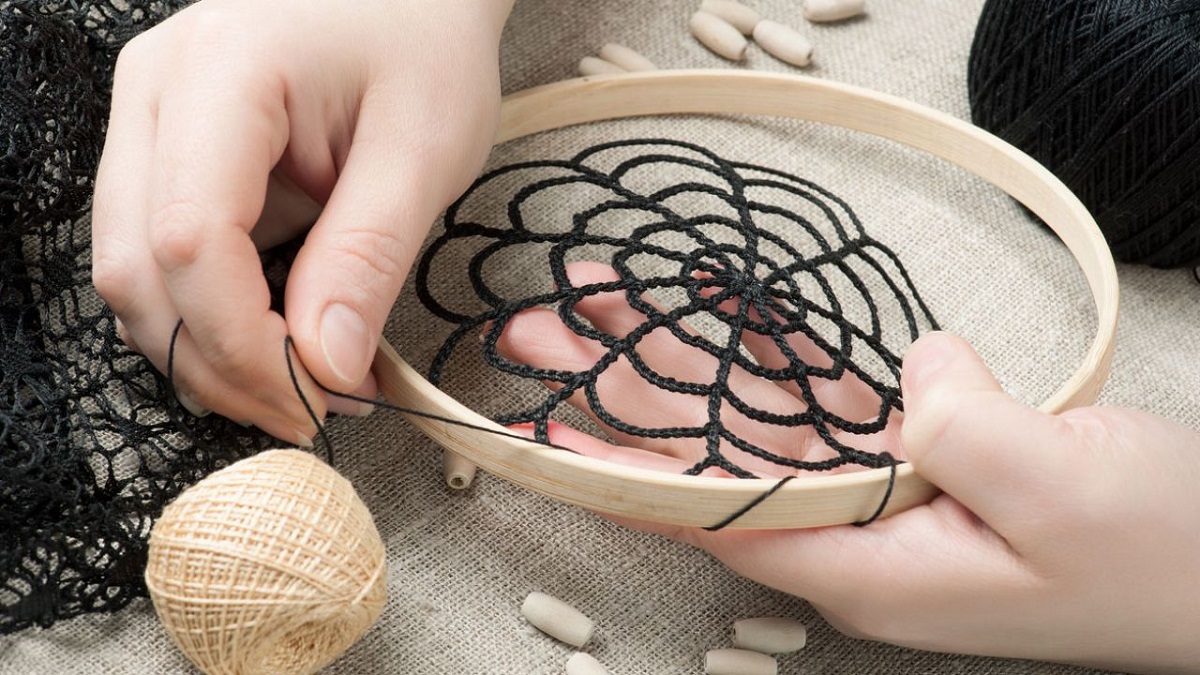
- 15 cm wooden embroidery hoop
- thread type
- Pompoms that we can make from wool
- Feather
- embroidery needle
Then perform the following steps:
- Step 1. Choose the size of the embroidery hoop you want to use, but if you don't know which one to choose, we think 15 cm is the perfect size for our children's projects. It is suitable for children of all ages.
- Step 2. Tie a knot around the hoop and have the children begin to wrap the string around the hoop. Once they're done adding yarn, tie them in place. You can let them add as much thread to the hoop as they like. That way, everyone can play with their dream catcher however they want. But if you have young children, you can always skip the earrings if you want to save yourself a hassle.
- Step 3. This part is easy, just make sure you pre-cut strands of yarn to size and lay them out on your work table. Have them begin to wrap the yarn around the loop in a mesh shape and tie it tight. Tip: It's best to have a hoop already made so you can demonstrate this step to younger children.
- Step 4:. Now it's time to add the bottom part of the dream catcher. Be sure to stock up on enough yarn, pom-poms, and feathers so kids can be as creative as they want. Tie some string of various lengths to the bottom of the dream catcher. This is a great opportunity to help young children. When adding pom poms, be sure to use a large needle. If you have small children, you will have to help them.
As you can see, making a dream catcher step by step is very easy, and you can reuse materials you have at home. The finishes have no relation to the products sold in the store. Also, yours will be unique and original, no one else will have the same one. If you get tired or want to try something new, you can always modify it to suit your needs at the time.